

Fast and Easy Homemade Essential Oil Diffuser
OK, here’s a really quick tip to make your house smell awesome with a homemade essential oil diffuser.
If the idea of little wax particles and smoke floating around your house is a turn off, smoky incense bugs you, or if you just want to try something new to make your house smell great this diffuser is for you. You might take one look at the picture above and think to yourself that it doesn’t look like a diffuser.
Well, that’s true, it doesn’t look like a “normal” diffuser. It doesn’t have reeds or a candle burning under a little tray of oil. However, it is a diffuser because it does disperse small quantities of the essential oil into the air, which after all is all we really want.
It is really easy to do at any time, and without having to buy anything new or special, and that’s something I like. So without further ado, here’s how you can make your own homemade diffuser.
Time: 5 min.
See my Rice & Essential Oils Diffuser post for another quick and easy air freshener recipe.
– What You’ll Need –
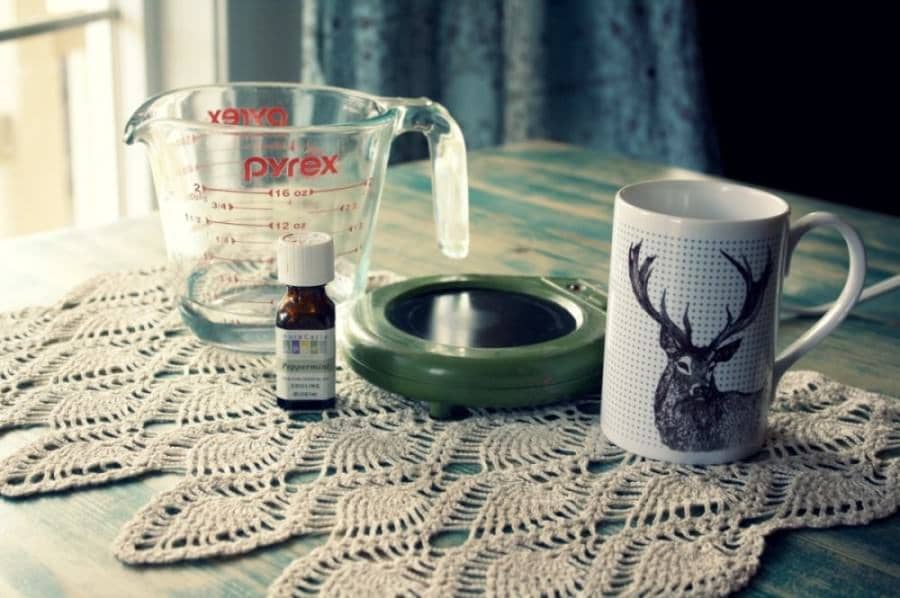
Here is what you’ll need to make your diffuser, most of which you might already have around the house.
- essential oil (essential oils)
- water
- cup, mug (something that can get hot)
- candle/mug warmer (candle warmer, mug warmer)
(links are for Amazon products)
– Step One –
Pre-heat
Plug in your mug or candle warmer, and turn it on. It should be just fine heating up while you get the rest ready.
[amazon box=”B000E3DTG0″ template=”widget-small” tracking_id=”homeexp15-20″]
– Step Two –
Pick your container
You can use any sort of container you like so long as it can handle the heat. That will generally be things that you can already get really hot in the microwave or bake.
A couple of options that I have are a ramekin, a nice pyrex measuring cup, or a mug. Personally I just use a mug like I have in these pictures, or sometimes even my pyrex measuring cup. Use whatever is easiest for you.
(If you like the mug in the picture, check out Cherith Harrison of Edinburgh Scotland who makes them. My wife and I love her stuff, we each picked up a mug while we were in Scotland.)
– Step Three –
2-3 shakes essential oil
Grab your container, for this I’m using a my nice Scottish mug.
In the meantime put a kettle on to boil, or get you tap running so that it is nice and hot. While your water is warming splash around 2 – 3 drops of your favorite essential oil into your cup or dish.
It doesn’t have to be three little drops, give it a good shake. The more oil the more scent you will get.
I usually reach for my peppermint oil, but vanilla, cinnamon, or whatever strikes your fancy will work just fine. You can even mix and match to get just the scent you want.
If you don’t have a a selection of essential oils on hand already a good starter set will give you a good selection of oils to work with as you figure out what types of oils and scents you like the most!
[amazon box=”B06XRLR9RQ” template=”widget-small” title=”Lagunamoon Essential Oils Starter Set” tracking_id=”homeexp15-20″]
– Step Four –
1/4 cup boiling water
Then add a little bit of hot water to the glass, around 1/4 to 1/2 of a cup is just right.
Too little, and your water will evaporate away too quickly, using too much water will make it harder for the candle heater to get the water warm enough to evaporate, and it will also dilute your essential oil, and thus cutting down on the aroma that it will let off.
Adding in the essential oil first saves you the trouble of having to stir it up. I’m lazy, so I let the water do the work. Play around with the ratio and find what works best for you and your equipment.
Essential oils will vary in how strong they smell, so play around with them until you get it just how you like it. Have I mentioned that I’m good at doing dumb things.
Be careful, if you think, “hey I wonder how wonderful this smells,” right after you add the boiling water to the essential oil, like I did. Don’t just stick your nose over the mug, like I did. Or you might scold your nostrils with hot steam and super concentrated peppermint oil, like I did.
Try wafting the rising steam towards your nose like in high school chemistry class instead to avoid burning your nose.
– Step Five –
Keep it Warm
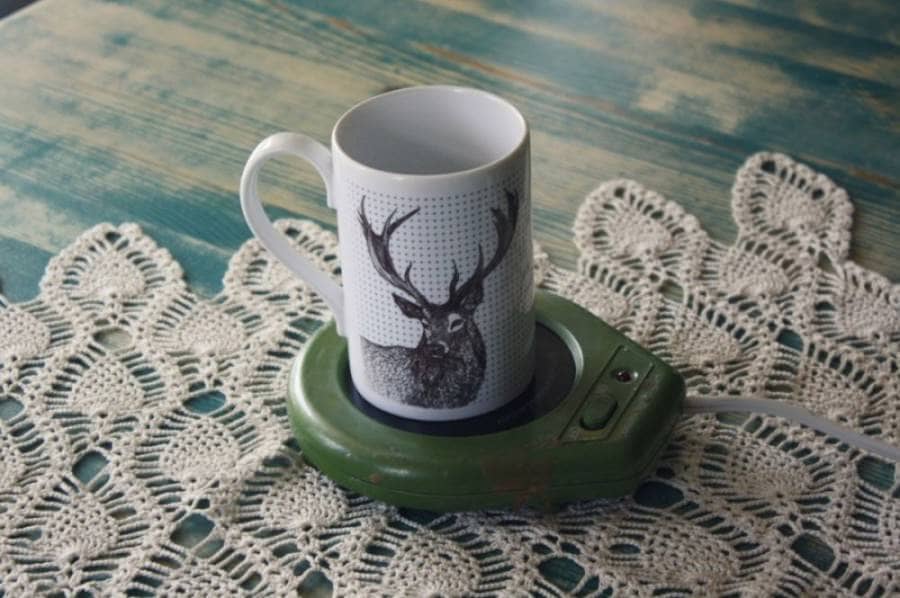
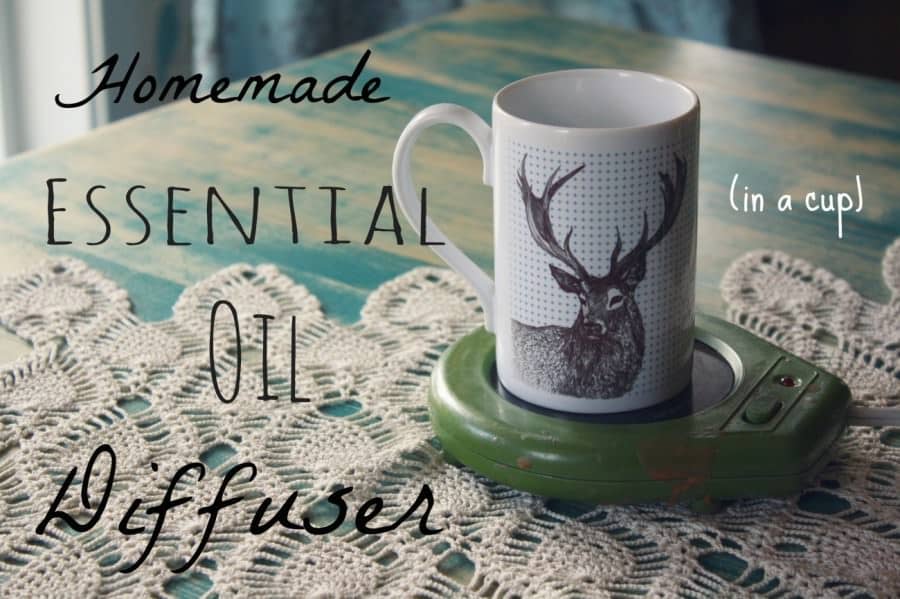
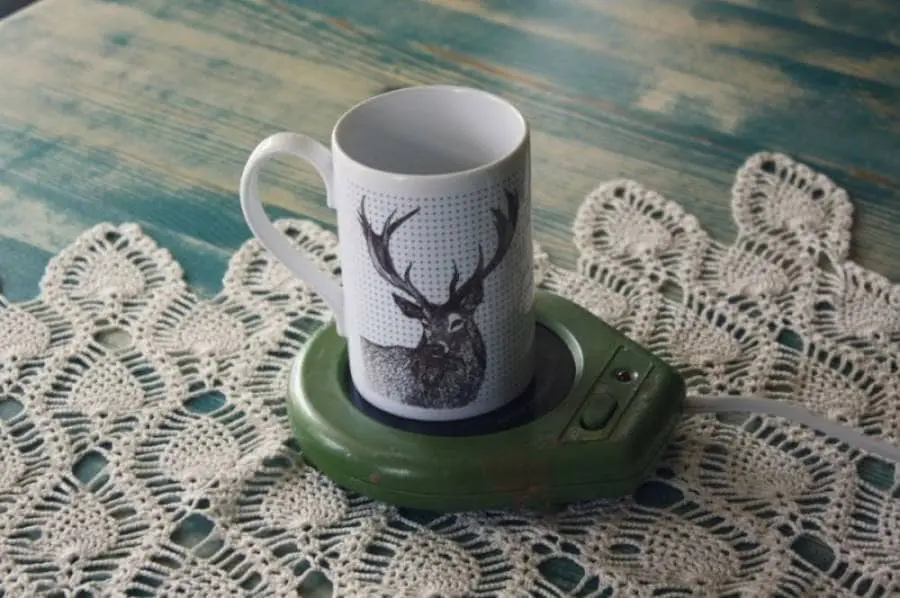
That’s it, now just put your mug, or whatever you’re using, on the warmer. If you used boiling water you should have beautiful scented air wafting your way immediately, and for hours to come thanks to the candle warmer.
Using something like this Mr Coffee mug warmer should do the trick. Don’t worry if the mug doesn’t seem like it is really hot. It only needs to be warm enough to cause the water to evaporate. So, if you can feel some steam rising off of the surface you’re good to go.
Be careful, the water will evaporate, so don’t leave the mug warmer on all night. Be sure to turn it off before the last of the water has evaporated just to be safe.
– My Experience –
This is something that works great, and I use all the time. In fact I did this the other day with some peppermint essential oil, and I was still getting little wafts of peppermint around my house all day long, and into the next.
I do really like using this method to make my house smell nice because there’s no candle smoke, so I don’t have to be paranoid about it leaving black marks on the ceiling.
This diy essential oil diffuser is worth a try, it’s really easy, and makes your house smell great. Let me know how this works out for you, or leave your thoughts in the comments. FYI, my house smells like peppermint right now, and it’s awesome! – Lance
Homemade Essential Oil Diffuser With a Candle Warmer
How to make your own homemade essential oil diffuser with a candle warmer.
Materials
- 2-3 drops Essential Oils
- 1/4-1/2 cup Hot Water
Tools
- Cup/Mug (can hold heat)
- Candle/Mug Warmer
- Tea Kettle
Instructions
 Preheat mug/candle warmer.
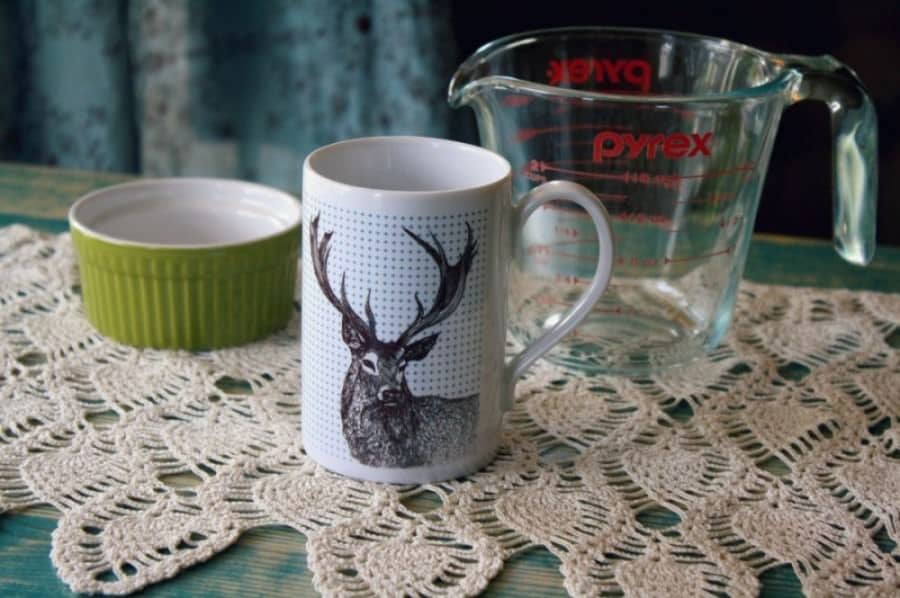 Pick a mug, ramekin, or some container that can hold heat well.
 Put your kettle on to boil
 Drop 2-3 (or more!) drops of preferred essential oil into mug.
 Pour hot water into mug until filled about halfway.
- Place mug on warmer. Don't forget to turn warmer off when you are done, the water will evaporate.
 Delight in a freshly scented home!
 Preheat mug/candle warmer.
 Pick a mug, ramekin, or some container that can hold heat well.
 Put your kettle on to boil
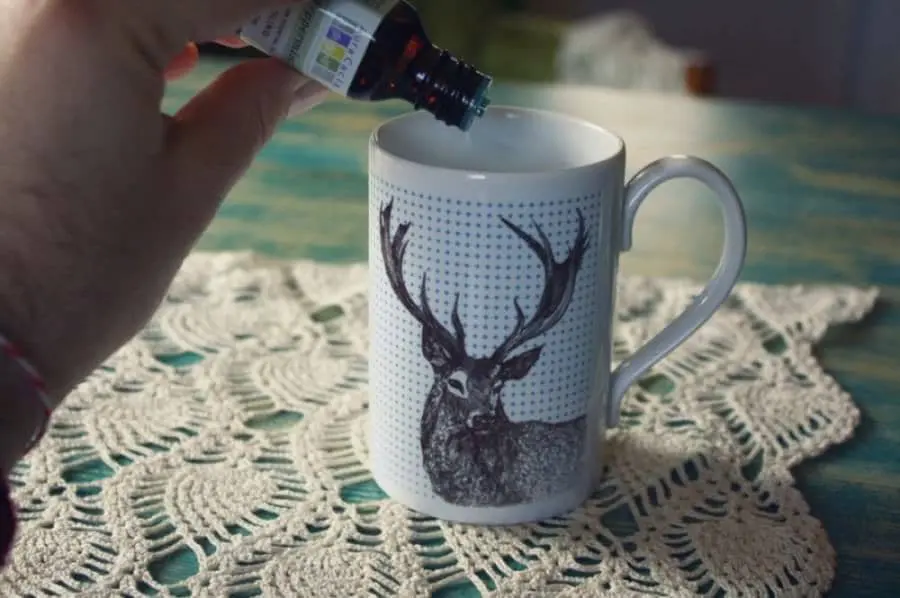 Drop 2-3 (or more!) drops of preferred essential oil into mug.
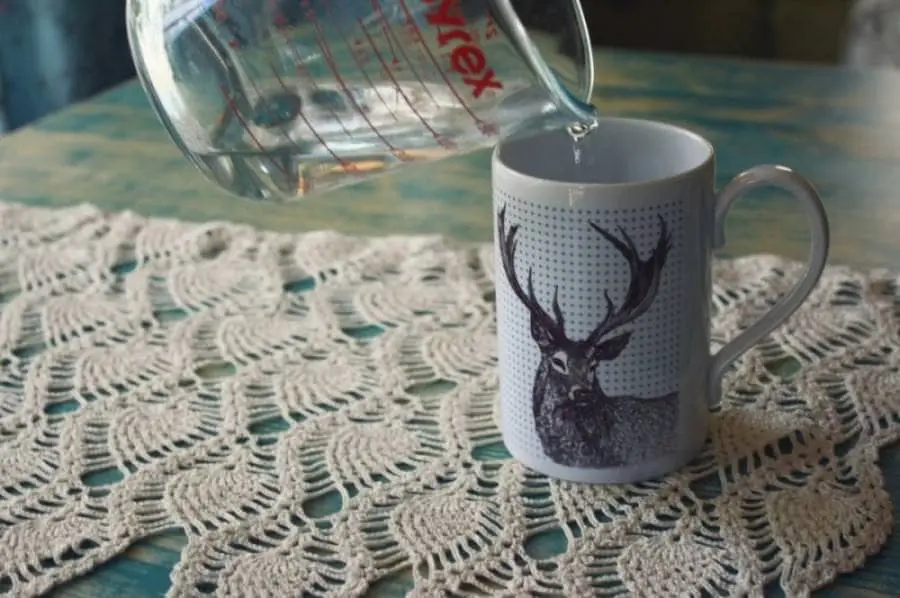 Pour hot water into mug until filled about halfway.
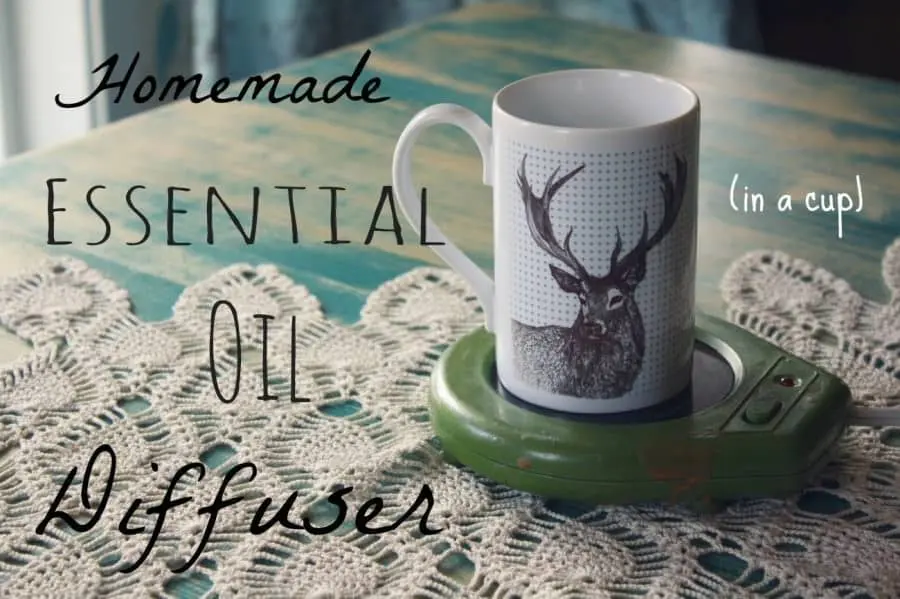 Delight in a freshly scented home!
Rene
Tuesday 28th of November 2017
Fellow asthmatic over here and horrible seasonal allergies too. Been doing my research about essential oils and stumbled into this and wow such a great idea. Going to try it now. Thanks a bunch.
Mollie
Thursday 23rd of January 2020
Hey Rene, thank you for taking the time to comment! How did it work for you?
Eileen Young
Saturday 4th of March 2017
Hi Lance: Thanks for sharing!!! That was a great suggestion with the mug and candle warmer.
Mollie
Thursday 23rd of January 2020
Thank you Eileen!
Betty
Tuesday 10th of May 2016
Wow - I am 88 years old. My "kids" have given me essential oils over the years and I have never known what to do with them - now I know! Thank you for this method of using my oils (that must be years old) - I'm excited to give this method a try. I am glad I came across your webpage. Thanks for sharing. Lance.
Mollie
Thursday 23rd of January 2020
Thank you for reading and commenting Betty! I hope you've found many ways to use your essential oils since visiting this post!
Lance
Saturday 15th of November 2014
Mary, I have asthma as well. I actually thought up this method because I missed my candles and incense too. I'm happy I could help a fellow asthmatic :)
It's true, there aren't many guys writing about these sorts of things. I figured why not and went for it! Thanks for the comment Mary it's encouraging!
Lance
Saturday 15th of November 2014
Definitely! I love easy little things like this you can do whenever the whim strikes. Thanks for the comment!